You’re reading this because you have decided to learn how to set up a company in QuickBooks Online (QBO). In addition, you want to keep your business financials in order, and QuickBooks seems like the perfect fit. Or, you could be an aspiring bookkeeper who is experimenting with QuickBooks Online and need help to set up an account so you can learn the ins and outs of the software to better position yourself as a bookkeeper. Either way, you’re in the right place. Continue reading to learn more.
I will assume you somewhat know what QuickBooks Online is, and you’re looking to set everything up to use the software. However, suppose you are not familiar with QuickBooks Online or its differences and QuickBooks Desktop. In that case, I suggest you read the QuickBooks Online Difference to get up to speed before you continue.
QuickBooks Online is a fantastic tool to manage your business financials and get the most benefit from the software; it’s essential to set up your company correctly to avoid problems. Before we begin, I suggest you gather the following business information to make setting up your QuickBooks Online company a breeze.
How to Set up a Company In QuickBooks Online
To access the company settings, you will need to click on the gear icon on the top-right corner of your page, then click “Account & Settings.” The link will lead you to the settings page, where you will see a list of categories on the left side. Next, click on the company tab.
Here you will see different sections that you can edit. The first part is called the “Company name”. You can add a logo, company, and legal name.

Please remember that your logo must be a JPG, GIF, BMP, or PNG file type and not be larger than 10 MB.
Just fill in the company name, and if your legal name differs from the company name, you can include that.
For the EIN/SSN section, include your federal employer ID number (EIN) if you have one. If not, you can include your social security number (SSN) instead. Your social security usually applies to sole-proprietors.
In the section for company type, you will need to choose your tax form and the industry that best describes your business. Choosing this must be correct because QuickBooks Online sets up your chart of accounts based on your selection, so correctly selecting the right industry is very important.

Include your company email and a customer-facing email for the contact info section. I highly recommend including a customer-facing email because this is where you will receive customer inquiries and payments, and it’s much easier to manage.
And last, add your company phone number and website URL, so they display on invoices, sales receipts, and estimates.

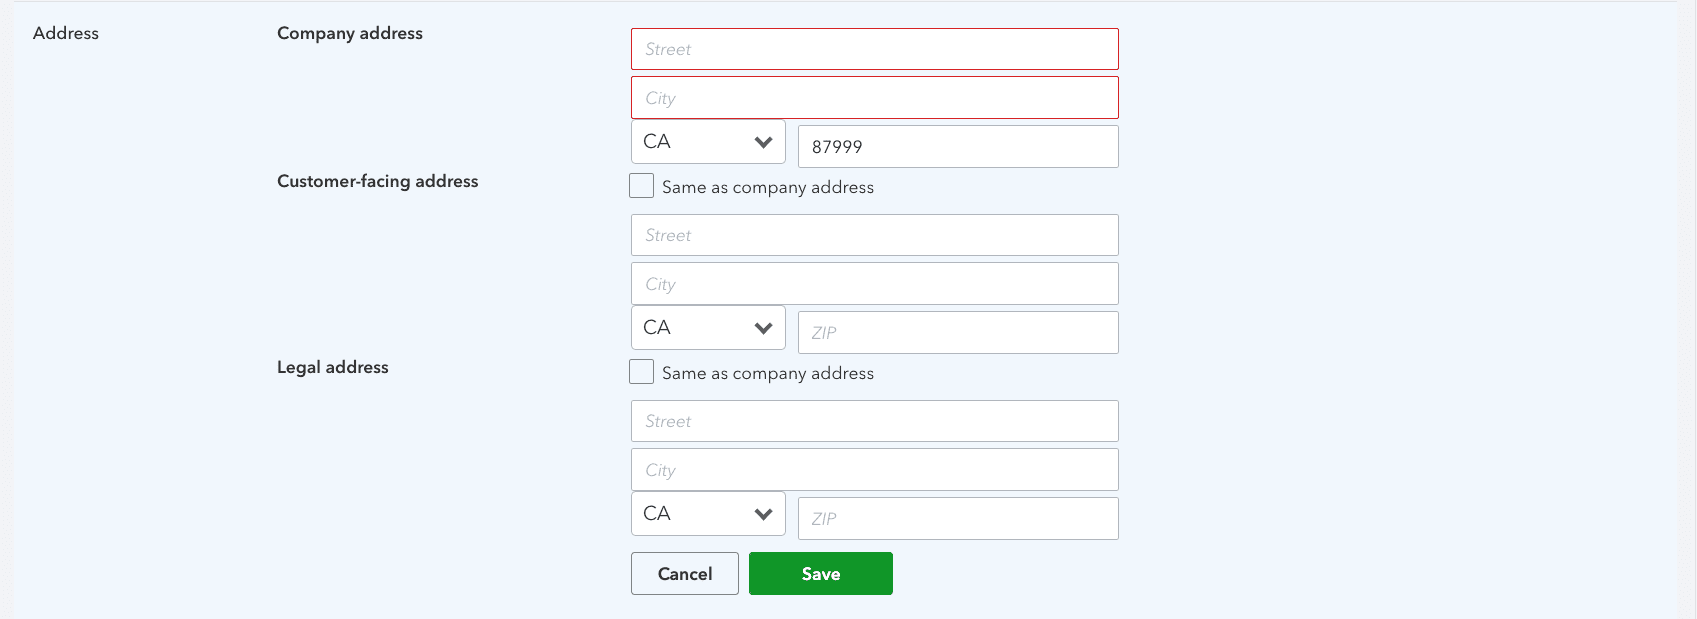
In the “Address” section, include your company address, customer-facing address, and legal address. For example, you can use a customer-facing address when you operate a home business and don’t want customers to know your address.
Please keep in mind that QuickBooks Online will use your legal address for filing taxes, but if you leave it blank, your company address instead. So please fill in this information correctly.

Once you have completed each section above, you can click “Done” in the lower right corner to finish setting up your company file.
Correctly setting up your QuickBooks Online company file is crucial, and now that you have accomplished this, you will keep accurate financial records for your business.


